
 Try for free
 Guides
Custom order table columns
Show, hide, and reorder Orders columns—and add fields from custom attributes, addresses, order note, or definition-based order metafields. Optionally make columns filterable for views.
Published · Updated
On this page
- What custom columns are for
- Open column settings
- Show, hide, and reorder columns
- Reorder columns
- Show or hide a column
- Standard columns
- Delivery status
- Add a custom column
- Steps
- Source types
- Order metafields
- Make a custom column filterable
- Delete a custom column
- Existing orders and re-sync
- Troubleshooting
- Custom column is empty for some orders
- Field not in the dropdown
- I do not see the Columns page
- Changes did not save
- At most N metafield columns
- Quick reference
- Next: filter and save views
What custom columns are for
Shopify orders often hold the data you need to run production—but not in the default Orders list. Orderline’s Orders table is configurable for your whole shop so you can see the right fields without opening every order.
You can:
- Show or hide built-in columns (Order, Date, Customer, Payment status, Channel, and others)
- Drag to reorder any column
- Add custom columns from order data: custom attributes, shipping or billing address fields, order fields (e.g. note), and order metafields that have a Shopify definition
- Mark custom columns Filterable so you can filter from the column header and save those filters in views
Changes apply to all staff. Column layout is managed in one place; individual staff members cannot set their own layout.
Ship by is a built-in column (when Order timelines are on). Deadline rules, urgency badges, and Flow ship-by use the dedicated ship-by deadlines path—not a generic metafield column—though the same order can also store other metafields as custom columns.
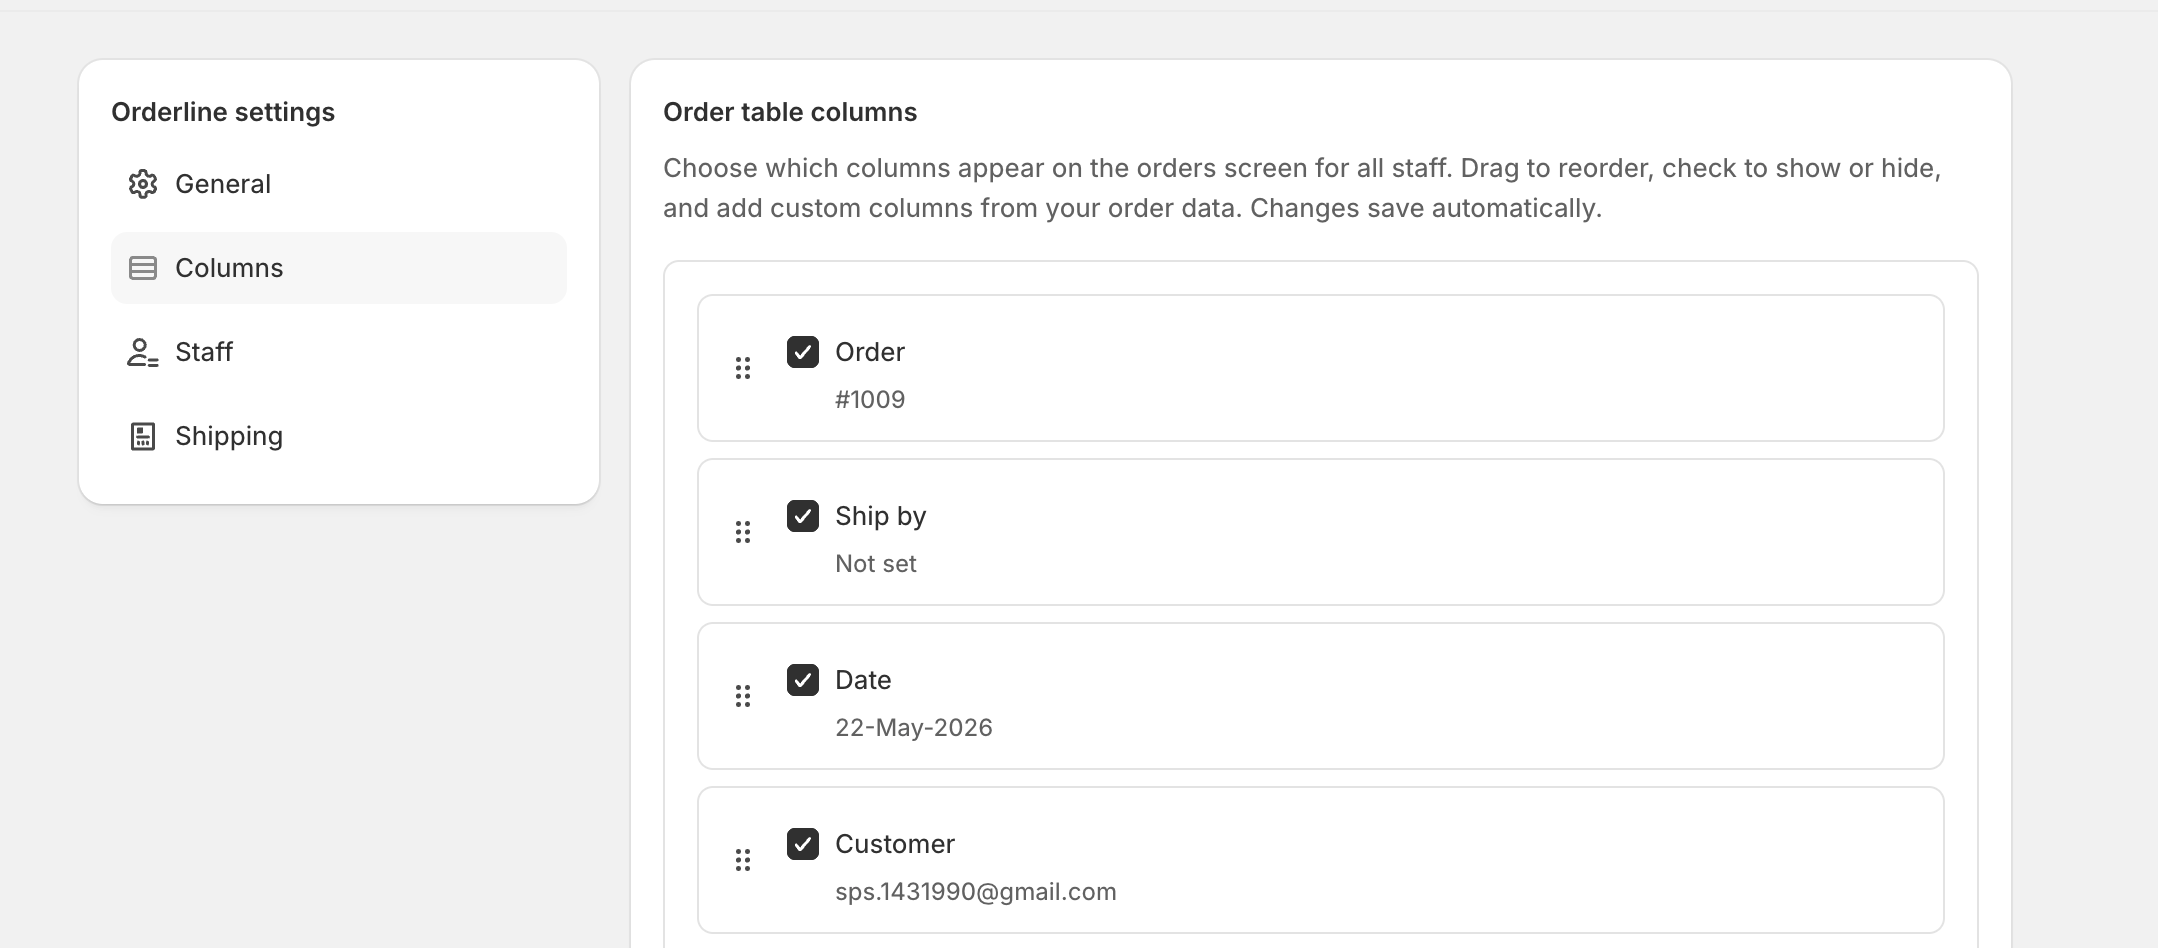
Open column settings
- Open Orderline from your Shopify admin.
- Go to Settings in the left sidebar.
- Click Columns.
Settings navigation with Columns selected
Show, hide, and reorder columns
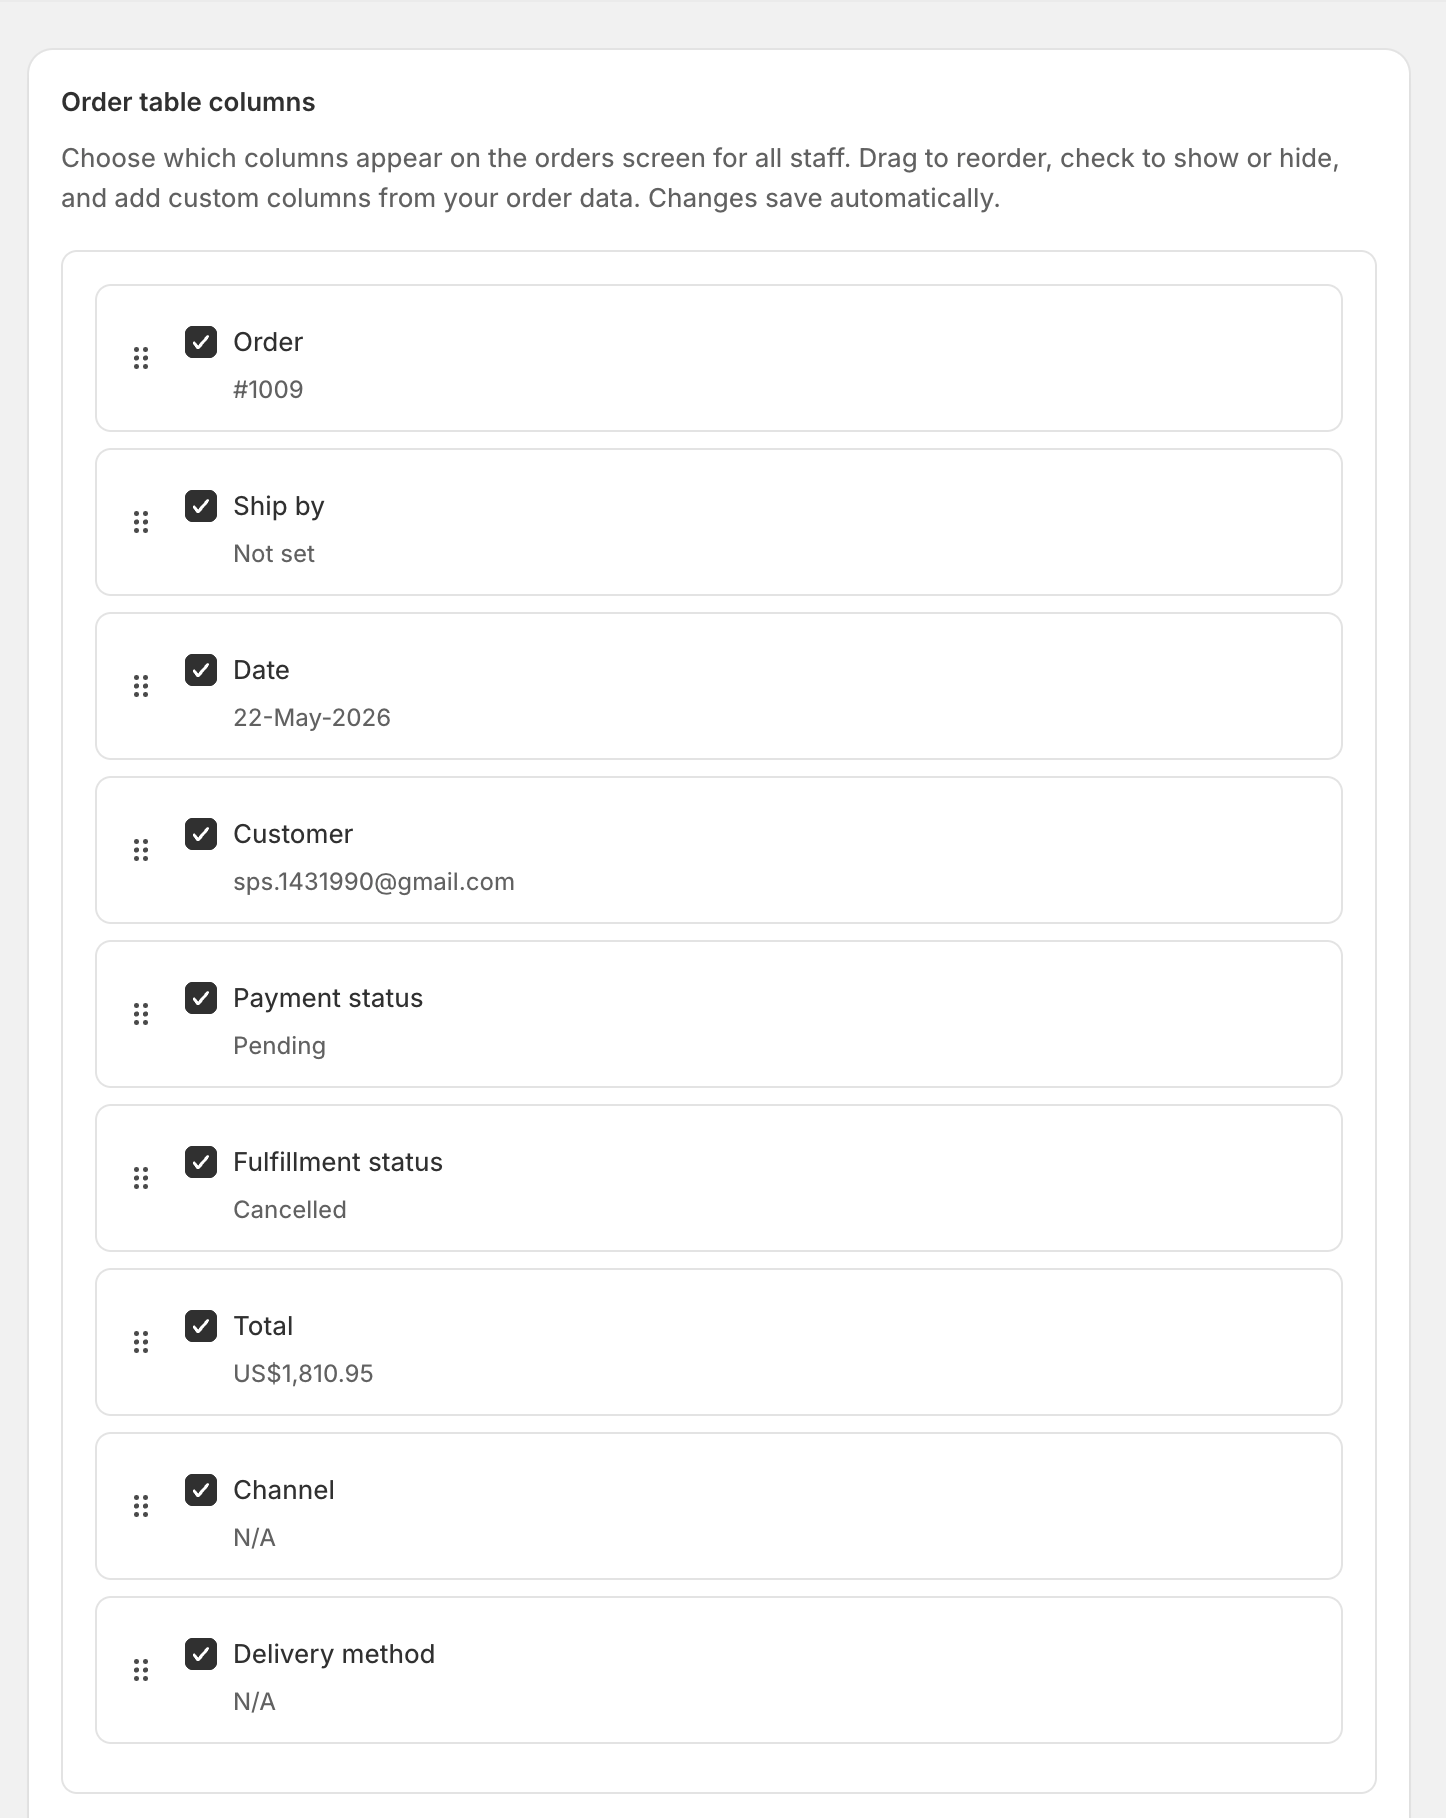
The column list shows every column that can appear on the Orders table. Each row has:
| Control | What it does |
|---|---|
| Drag handle (left) | Change column order |
| Checkbox | Show or hide the column on the Orders screen |
| Label + preview | Column name and a preview value when available |
| Filterable (custom columns) | Allow header filters and saved views on this field |
| Delete (custom columns only) | Remove a column you added |
Reorder columns
- Click and hold the drag handle on a row.
- Drag the row up or down.
- Release where you want the column to appear.
Changes save automatically. You will see a brief Saving… then Saved toast.
Column list with drag handles and checkboxes
Show or hide a column
- Checked — column appears on the Orders table for everyone.
- Unchecked — column is hidden but kept in your configuration (you can turn it back on later).
Use this to simplify the table without losing your layout. For example, hide Channel if you only sell on one sales channel.
Standard columns
These columns are available on every store. You can reorder and show/hide them; you cannot delete them.
| Column | What it shows |
|---|---|
| Order | Order name / number (link to Shopify admin) |
| Ship by | Ship-by date and urgency when Order timelines are enabled (Automatic SLA or merchant-managed) |
| Date | Order created date |
| Customer | Shipping name or email |
| Payment status | Paid, pending, refunded, etc. |
| Delivery status | Carrier progress from Shopify fulfillments: Tracking added, In transit, Out for delivery, Delivered (off by default — see below) |
| Fulfillment status | Fulfilled, unfulfilled, etc. |
| Total | Order total |
| Channel | Sales channel name (for example Online Store, Etsy, Faire) |
| Delivery method | Shipping line title |
Delivery status
Fulfillment status is Shopify’s order-level fulfilled / unfulfilled / partial. Delivery status is what happened after a fulfillment exists: Tracking added, In transit, Out for delivery, Delivered.
It is a standard column, unchecked by default.
- In Settings → Columns, check Delivery status.
- The first time you turn it on, Orderline fills in open work (and recent closed orders if you use completed-order views). You may see a short indexing-style wait on that row.
- After that, Shopify fulfillment webhooks keep the column current. Turn the column off to hide it; stored values stay.
Delivery status is not filterable in this version. Click a badge with tracking details to see carrier numbers when Orderline has them.
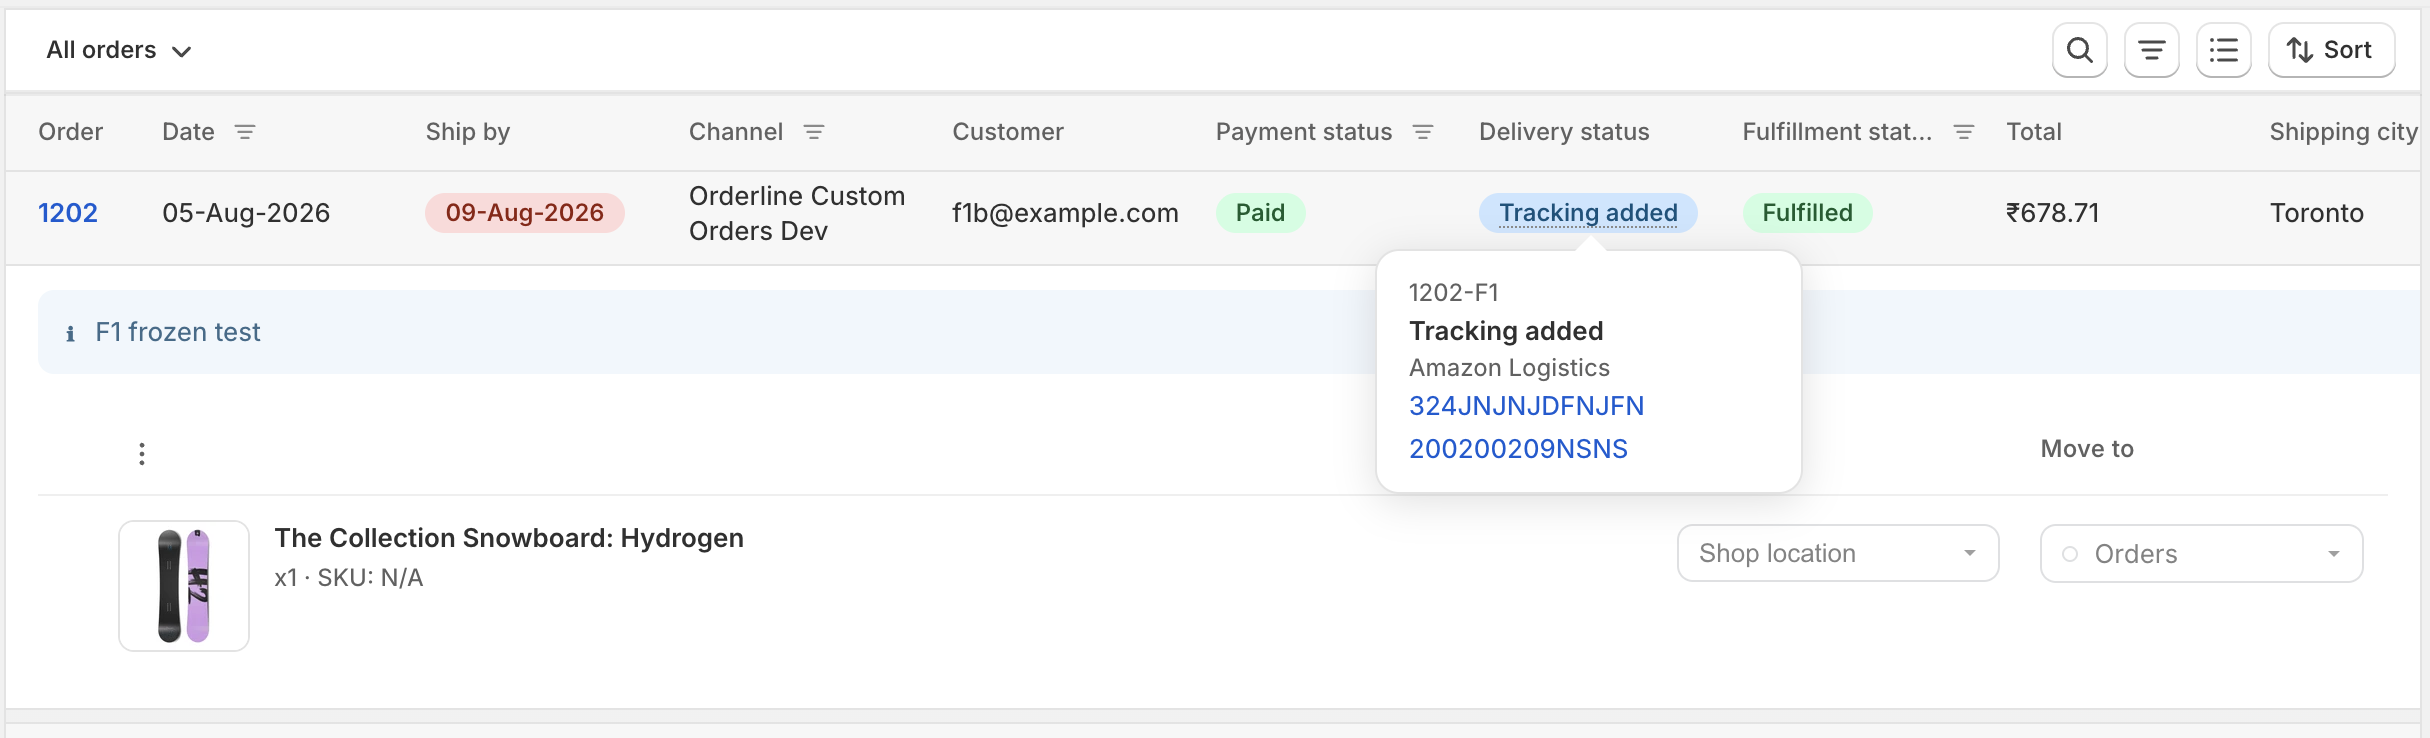
Orders table with customized column order
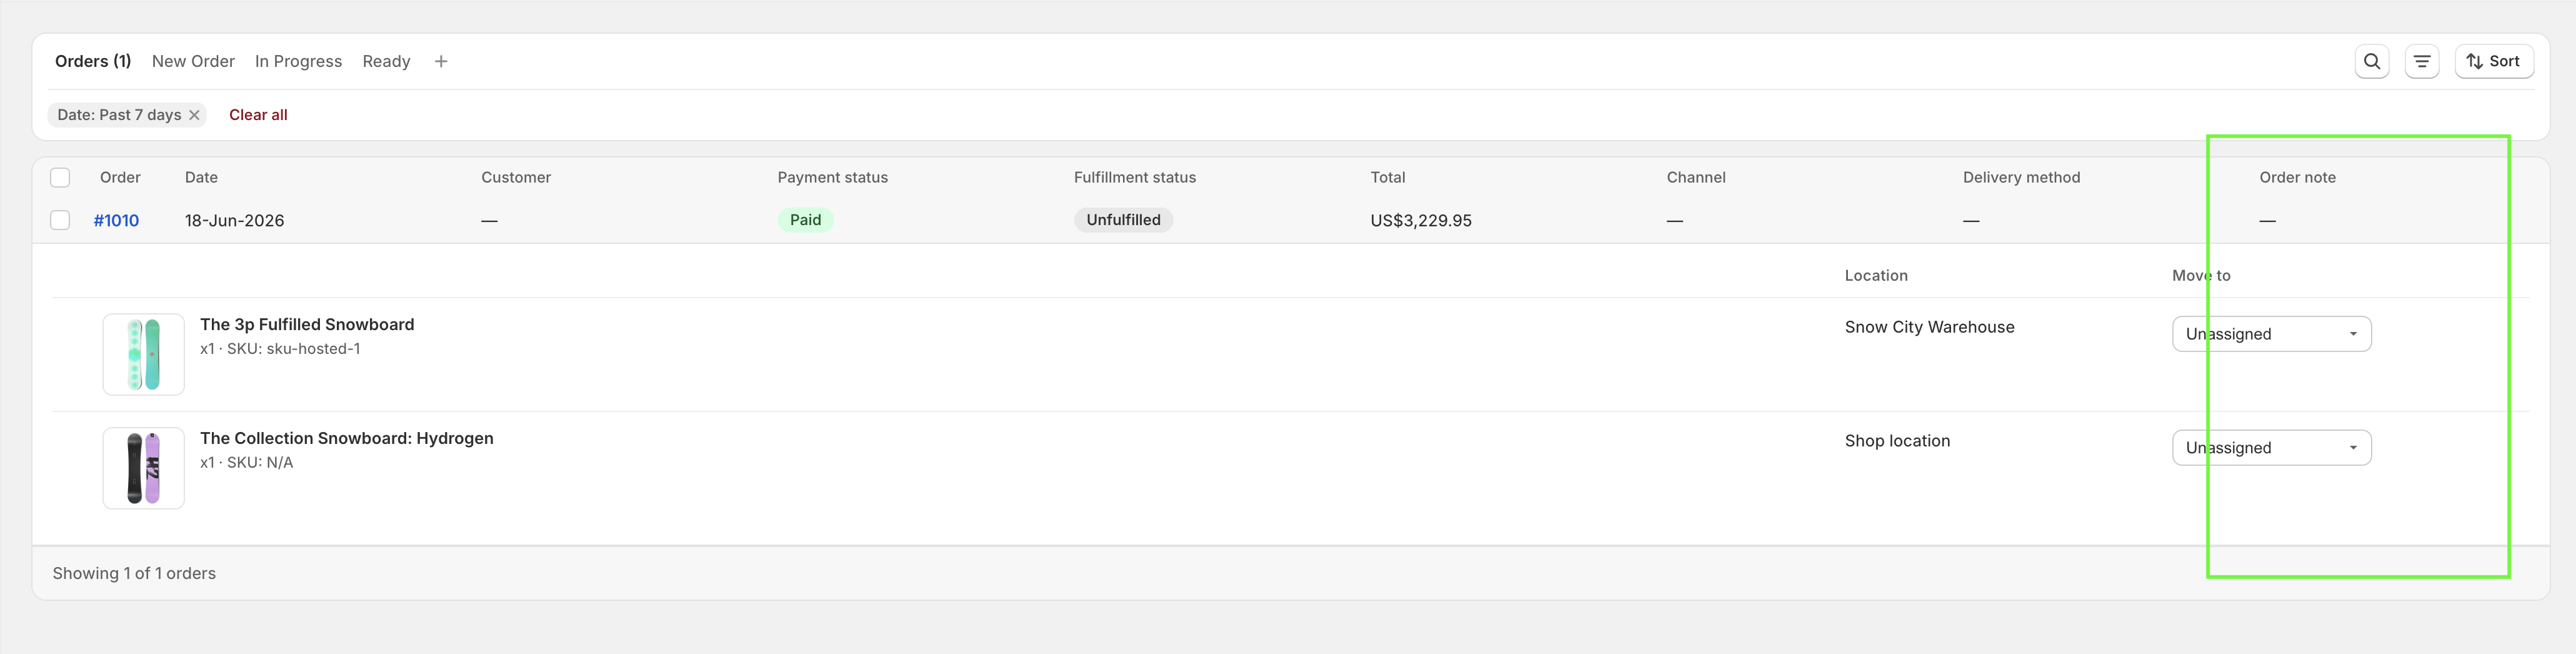
Add a custom column
Steps
- In Settings → Columns, open Add custom column.
- Choose Source (one of the types below).
- Choose Field from the dropdown (a preview value may appear next to the field name).
- Edit Column label if you want a different header (Orderline suggests a label in sentence case).
- Click Add column.
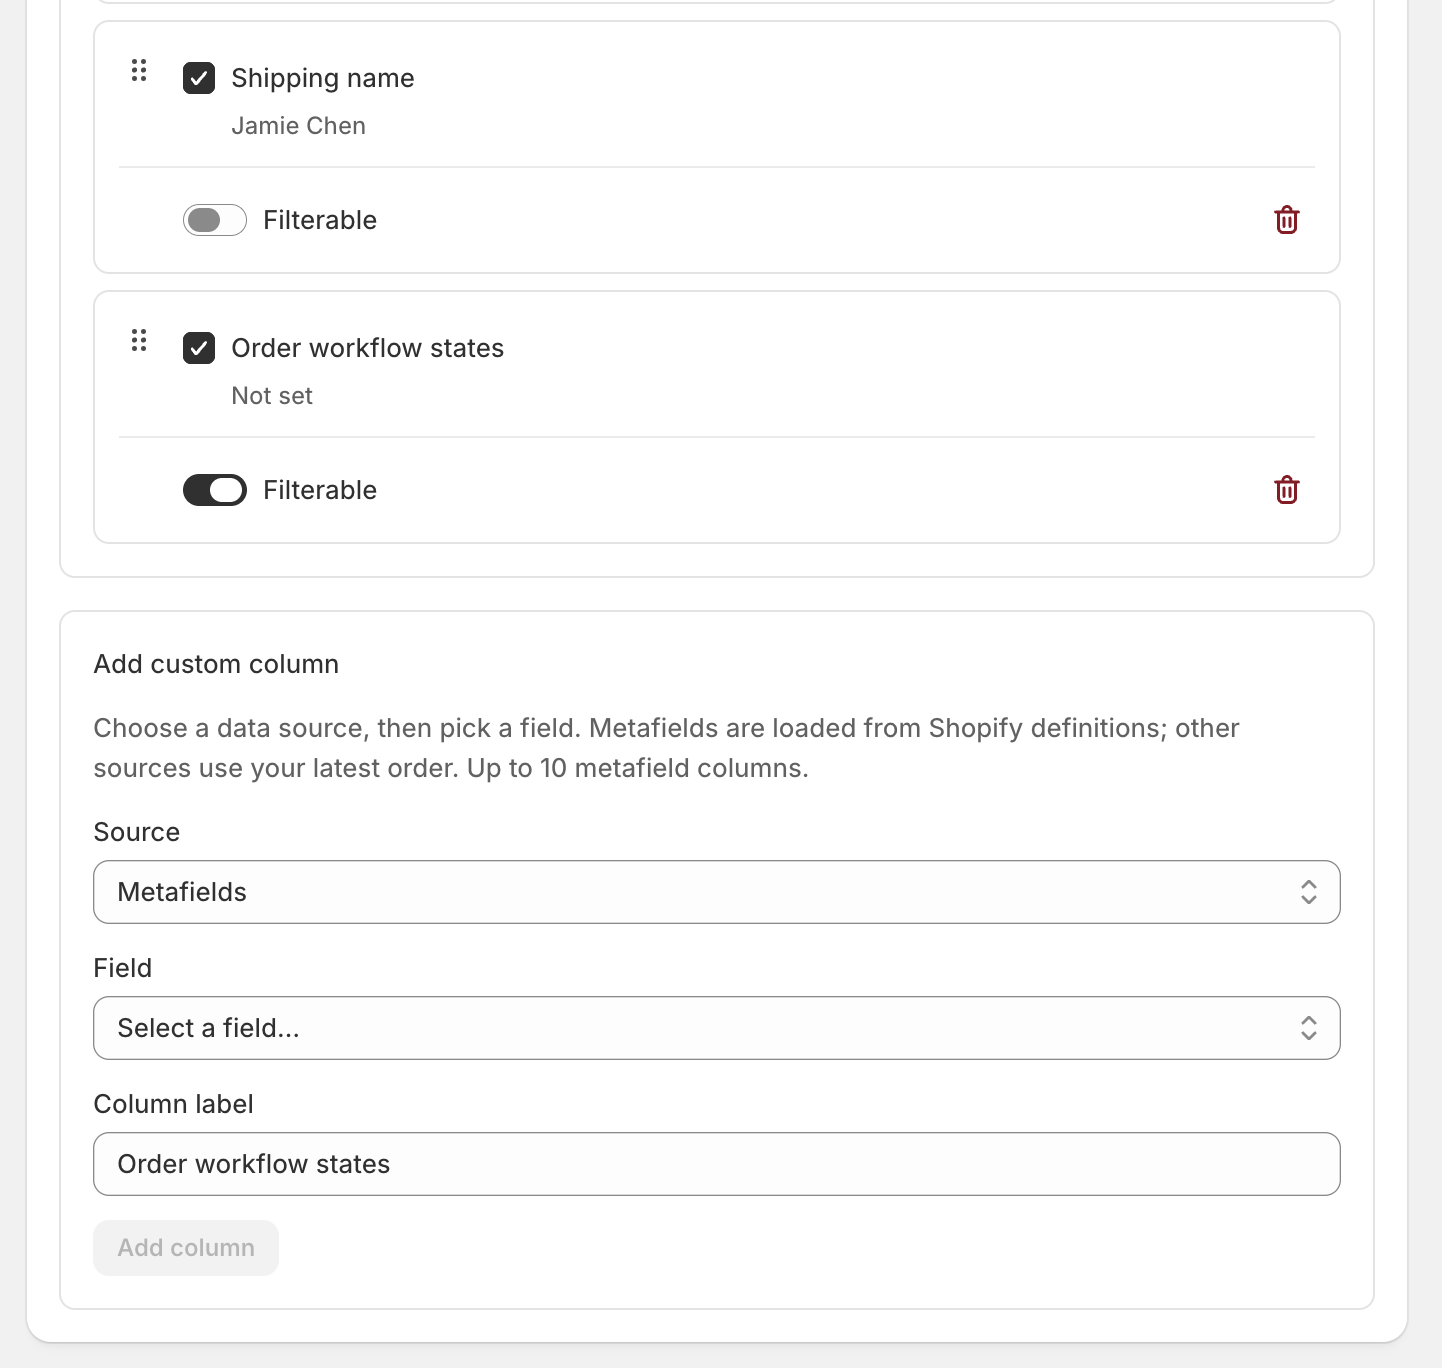
The new column appears at the bottom of the list. Drag it to the position you want. New custom columns start with Filterable off until you turn it on. You can add up to 10 metafield columns.
Columns settings with a metafield custom column and Filterable
Source types
| Source (Settings label) | What you can pick |
|---|---|
| Custom attributes | Checkout / app note attributes on the order |
| Metafields | Order metafields that have a definition in Shopify |
| Shipping address | Name, phone, lines, city, company, formatted address, etc. |
| Billing address | Same shape as shipping |
| Order fields | For example order note, customer email |
Long values are shortened in the table. Hover a cell to see the full text when the UI provides a full-text hover.
Order metafields
Use Source → Metafields when another app, checkout extension, or Flow writes order-level data into defined order metafields (for example a retailer code, PO reference, or preorder-related date stored as an order metafield).
| In product today | Not in this path |
|---|---|
| Order metafields with a Shopify definition | Typing an arbitrary namespace and key by hand |
| Optional Filterable for header filters and views | Line-item, product, or variant metafields as order-row columns |
| Cap of 10 metafield columns per shop | Adding every metafield without choosing columns |
If the Field list says No order metafield definitions found for this shop, create or confirm definitions under Shopify Admin custom data for orders, then reopen Columns.
Ship-by deadlines use a dedicated Ship by column and, in merchant-managed mode, the fixed Flow metafield orderline.ship_by. Prefer the ship-by guide for deadlines and urgency—not a generic metafield column—unless you deliberately want the same value visible as an extra column.
Make a custom column filterable
- On the custom column row, turn on Filterable (see the Columns screenshot above).
- Orderline may show Indexing… while it builds filter indexes for open orders.
- When ready, use the filter control on that column header on the Orders screen, then optionally save a view.
If indexing fails, the UI can show Index failed—retry or contact support if it persists.
Standard columns that support filtering stay available when visible; custom columns require the Filterable switch (off by default for new columns).
Delete a custom column
- Click the delete icon on the custom column row.
- Confirm in the dialog.
Standard columns cannot be deleted—only hidden.
Existing orders and re-sync
Column settings take effect as soon as they save. Cell values come from order data stored in Orderline.
| Situation | What to do |
|---|---|
| New orders after you add a column | Values fill in as orders sync |
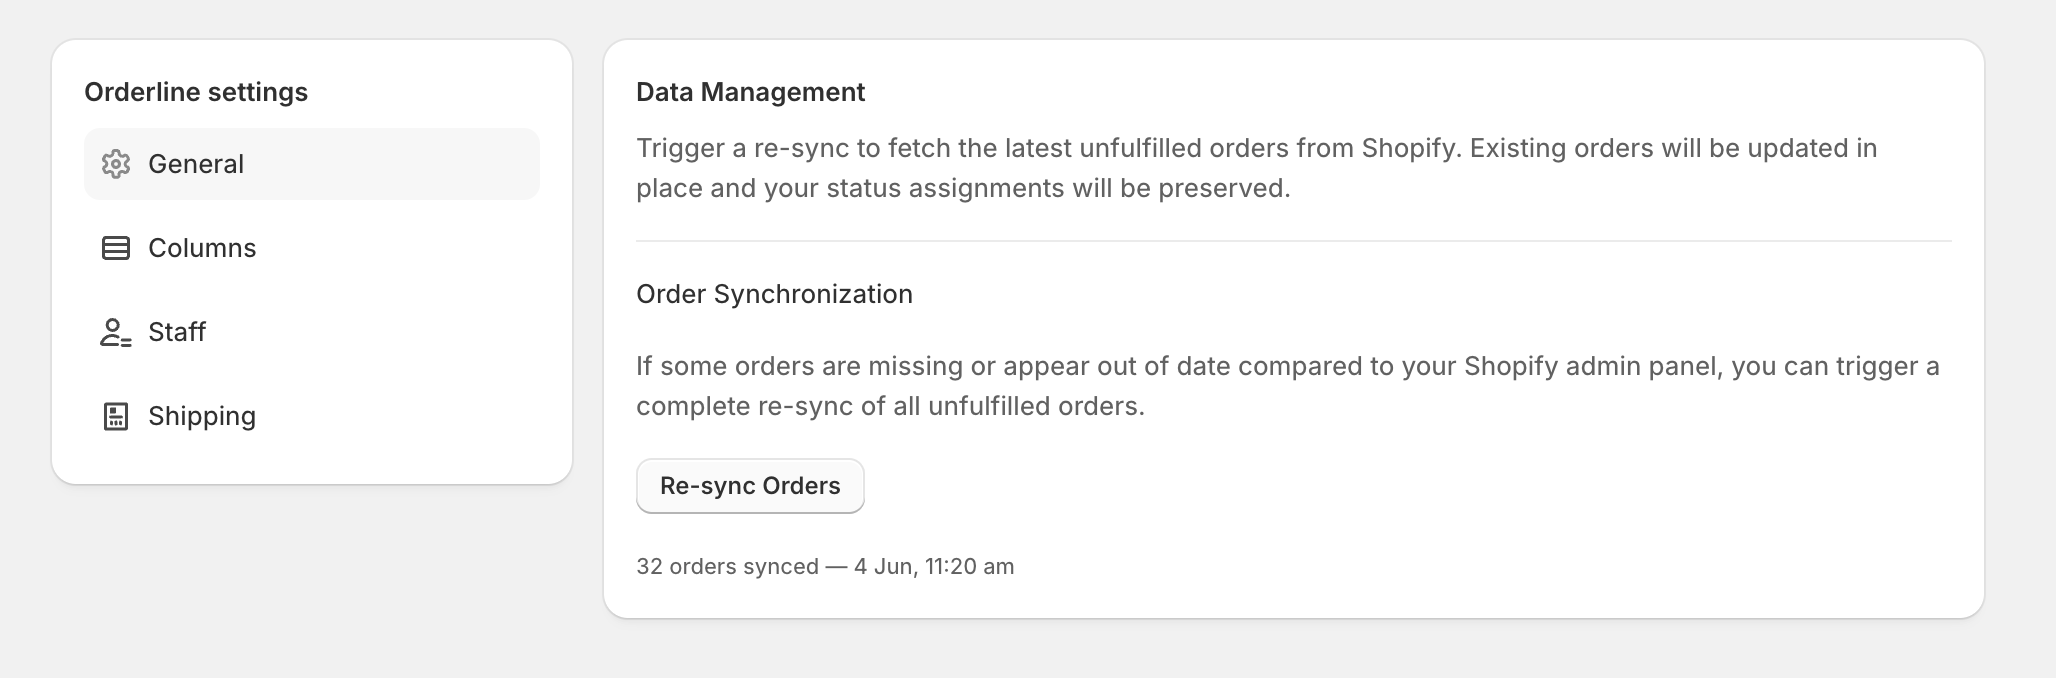
| Older orders missing attribute or address values | Run Settings → General → Re-sync orders |
| New metafield column | Open orders are filled for the keys you configured (you may see Indexing… if Filterable is on) |
| Column layout not updating on Orders | Leave Settings and open Orders again |
Re-sync on Settings → General
Troubleshooting
Custom column is empty for some orders
| Cause | Fix |
|---|---|
| Order synced before that data was available | Re-sync, or wait for the next order update |
| Field empty on that order in Shopify | Check the order in Shopify admin |
| Wrong field selected | Remove the column and add again using the preview line |
| Metafield has no definition | Only defined order metafields appear under Metafields |
| Private / inaccessible metafield | Other apps’ private fields may not be readable; use merchant-visible definitions |
Field not in the dropdown
Custom attributes / addresses / order fields
- Confirm the field exists on orders in Shopify.
- If values are missing after a recent app or checkout change, run Settings → General → Re-sync orders.
- Fields you already added as columns will not appear again in the list.
Metafields
- Confirm an order metafield definition exists in Shopify for that field (Custom data → orders).
- Fields without a definition will not appear under Source → Metafields.
I do not see the Columns page
You need permission to manage shop settings. Ask your store admin to adjust staff permissions or configure columns for you.
Changes did not save
Check for an error banner at the top of the page. Ensure you have a stable connection. Try toggling a column or reordering again—each change triggers an automatic save.
At most N metafield columns
The app enforces a maximum of 10 metafield columns. Remove an unused metafield column before adding another.
Quick reference
┌────────────────────────────────────────────────────────────┐
│  CUSTOM COLUMNS CHECKLIST                                    │
├────────────────────────────────────────────────────────────┤
│  ☐ Settings → Columns                                        │
│  ☐ Show/hide and reorder standard columns                    │
│  ☐ Re-sync if attributes/addresses missing on older orders   │
│  ☐ Add custom column: pick Source, then Field                │
│  ☐ Metafields: only defined order metafields; max 10         │
│  ☐ Turn on Filterable when you need header filters / views   │
│  ☐ Drag columns into position; open Orders to confirm        │
└────────────────────────────────────────────────────────────┘
Next: filter and save views
Once columns (and Filterable where needed) are set up, filter the orders table and save those filters as reusable views—including search, channel, payment, and custom-column filters.
For ship deadlines and urgency colors, see Order deadlines (ship-by date).
Need more help? Contact Orderline support or see Getting started if you are new to the app.