
 Try for free
 Guides
Packing slips for production (Production manifests)
Print packing slips from the Orderline Orders list, and add extra fields—delivery date, phone, card message—from the columns you already use.
Published · Updated
On this page
What packing slips (production manifests) are for
Orderline packing slips are work sheets you handover to your staff when they are working on the order. It has all the details like product image, title, quantity, customizations, order notes etc. they would need to create a product based on the customer’s requirements
You print them from the same Orderline orders list you use for production. It gets printed on an A4 size paper - one sheet for one order.
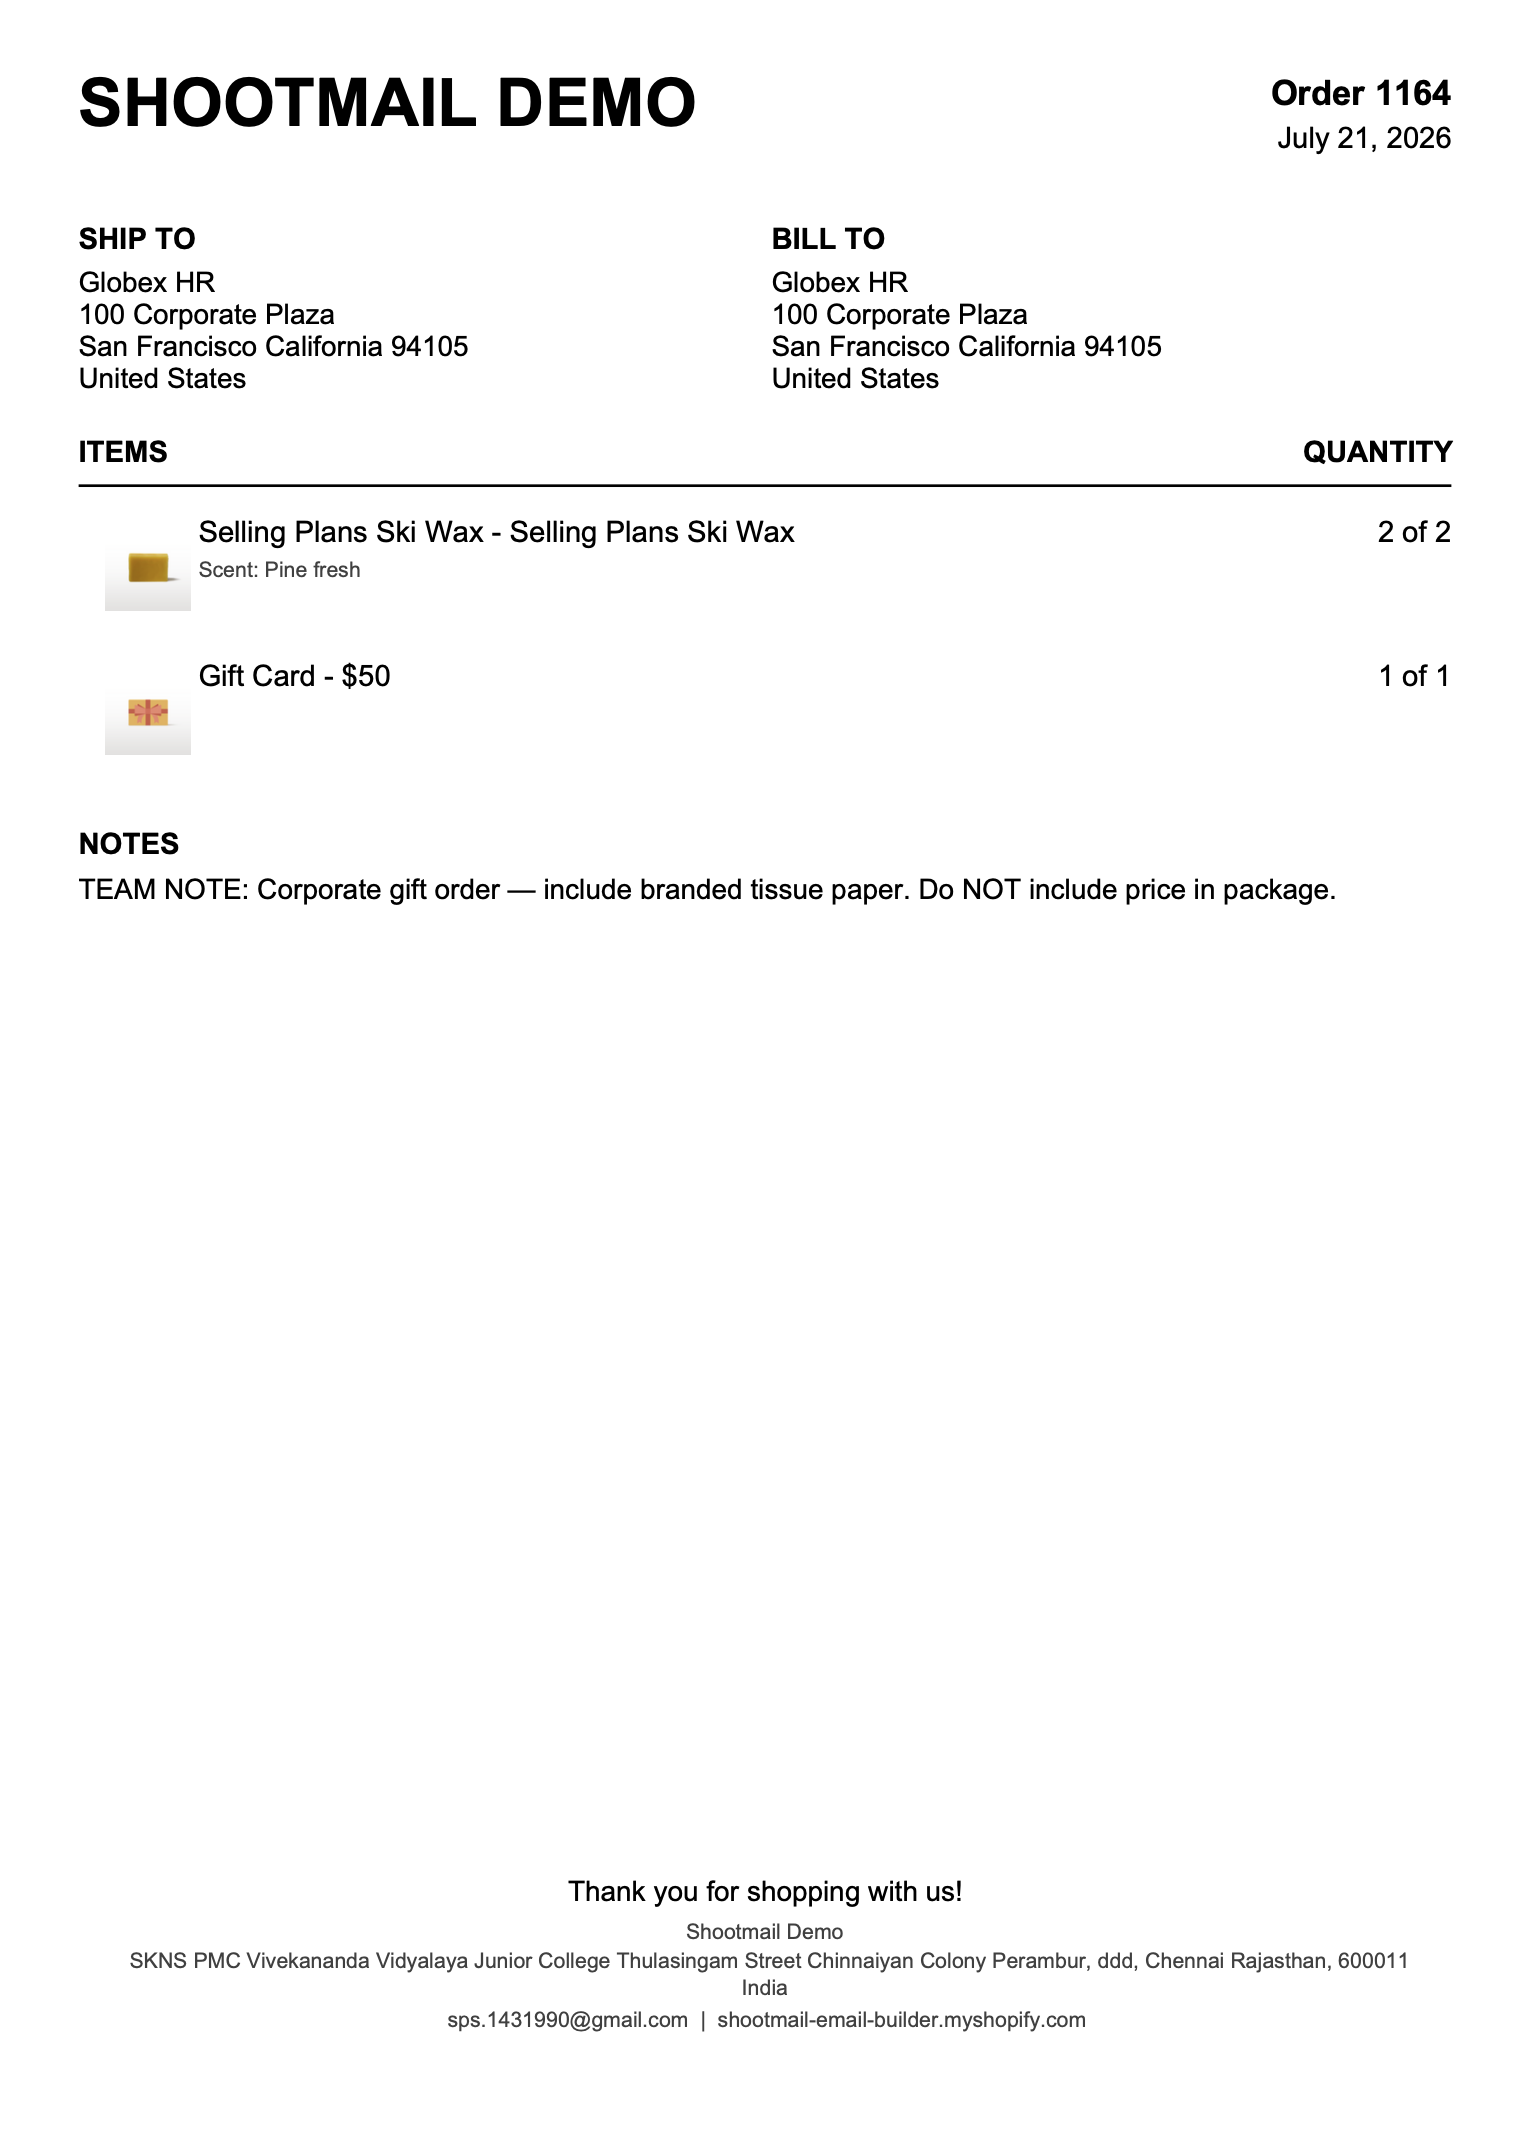
You can even add extra custom fields to your packing slips. Extra fields come from order columns you already configured. For example, if you have a flowes delivery business, you might want to add delivery time and delivery date to the production manifest for your staff to see.
Print from the Orders list
- Open Orders in Orderline.
- Select the orders you want (row checkboxes).
- Choose Print packing slips.
You can print up to 25 orders at a time. If you select more, Orderline asks you to shrink the selection.
On a computer, Orderline downloads a PDF.
On a phone or tablet (Shopify Mobile or a small browser), the download would not open. Orderline now opens a print preview instead, then your device print sheet—AirPrint, Save PDF, or a nearby printer.
Closed-order views (completed / cancelled / refunded) hide packing slips. Those lists are read-only history; slips stay for open work. See completed and cancelled orders.
Customize the slip
- Open Settings → Packing slips.
- Use the live Preview (it uses a sample order from your shop).
- Add extra fields and turn built-in blocks on or off. Changes save automatically.
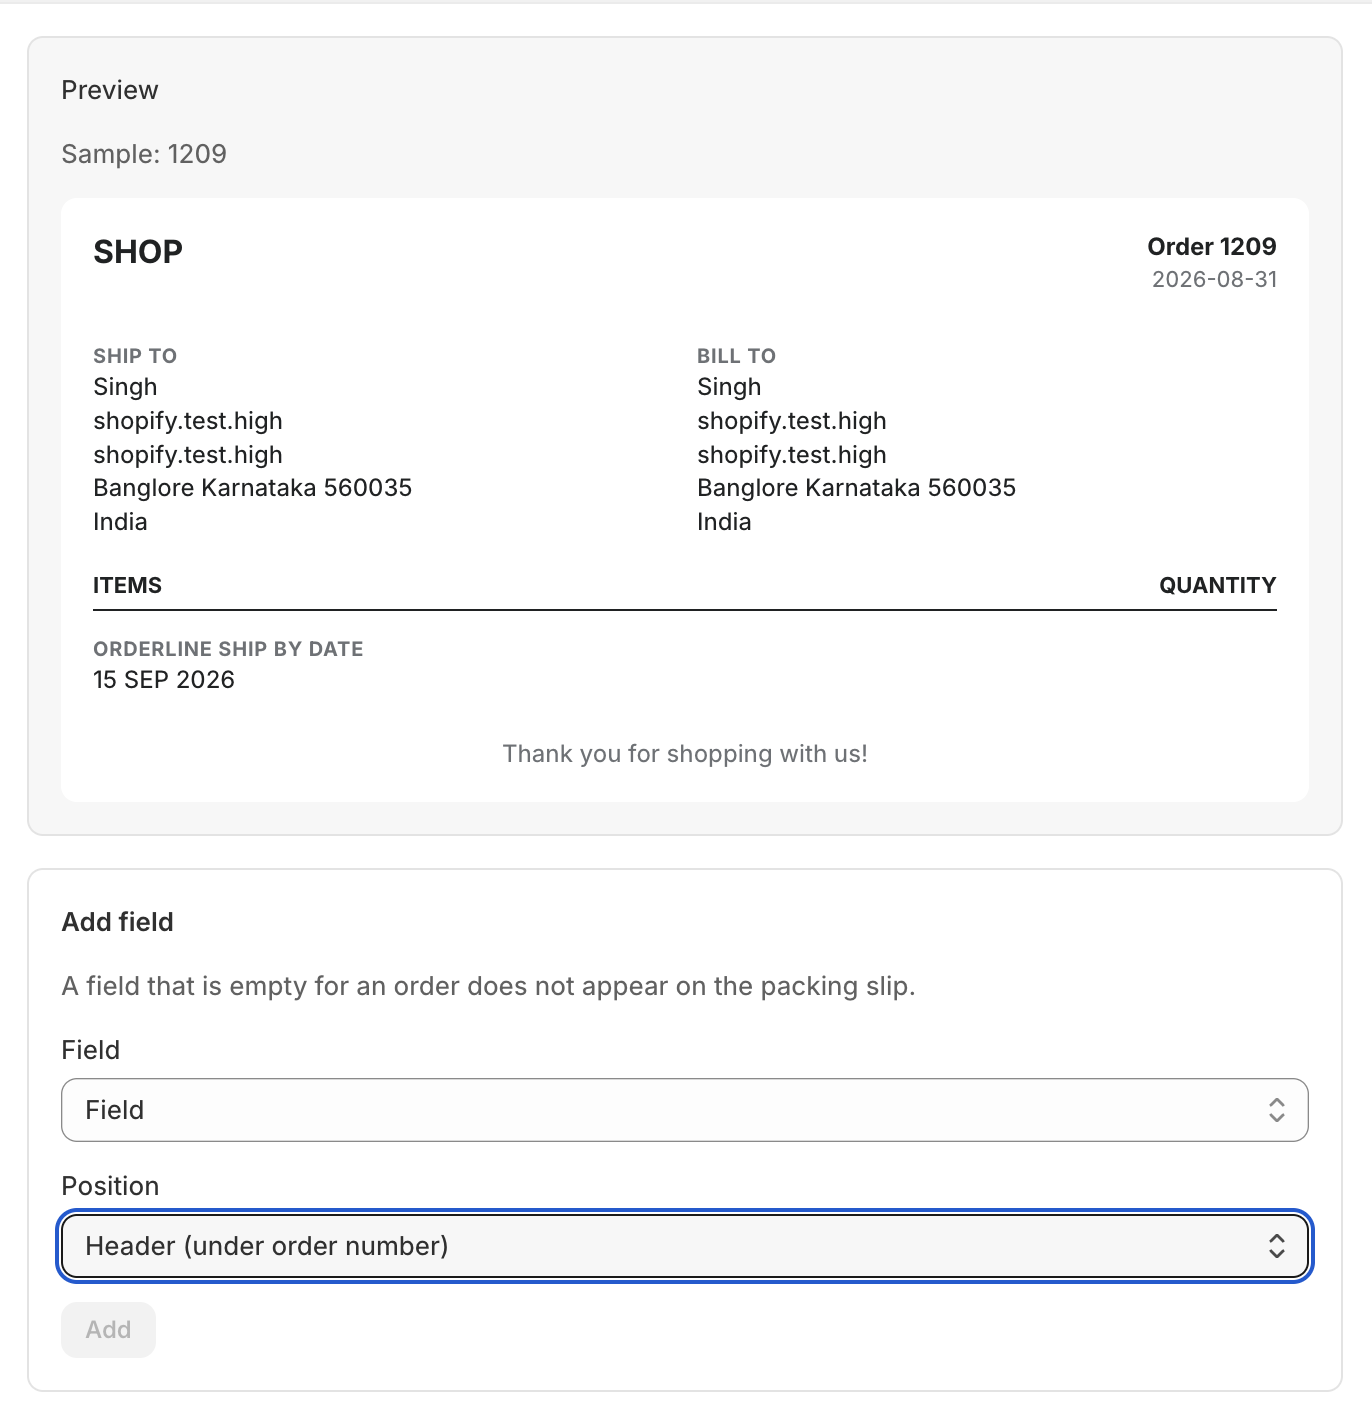
You need permission to manage settings. Staff who only work the Orders list can still print using the shop’s current layout.
Extra fields (delivery date, phone, message)
Anything you want on the slip besides the default blocks must already exist as a column—visible or hidden.
- If the field is not in Settings → Columns yet, add it there. Uncheck it if you do not want it on the Orders table.
- Back on Settings → Packing slips, under Add field, pick that column.
- Choose Position:
- Header (under order number) — dates, phone, delivery window
- Below items — card message, extra notes after the product block
- Click Add.
You can add up to 20 extra fields. A field that is empty on an order does not print (no blank caption). Use the switch on a field to hide it without deleting it; use the delete control to remove it from the slip.
Example: a florist checkout attribute Shipping date becomes a column, stays off the table if you like, then prints in the slip header.
Built-in blocks
These are the pieces of today’s default slip. All start on. Turn any off if you do not need them:
| Block | What it prints |
|---|---|
| Shop name | Your shop name at the top |
| Order date | When the order was created |
| Ship to | Shipping address |
| Bill to | Billing address |
| Product images | Small thumbnails |
| Variant / options | Variant title next to the product |
| Line-item customizations | Visible line-item properties (hidden _ keys stay off) |
| Notes | Customer checkout note and internal production notes |
| Footer | Thank-you line |
The skeleton stays fixed: order number → header fields → line items → below-item fields → notes → footer. You place extra fields into header or below-items; you do not drag a free-form canvas.
This is not Order Printer Pro: no logos, fonts, HTML templates, or per-staff layouts.
Native Shopify packing slips
Orderline packing slips are PDFs printed from the work list. They are not Liquid templates for Shopify’s built-in packing slip editor.
If you want a branded customer packing slip in Shopify Admin, use the free Shopify packing slip templates designer. It generates Liquid for Settings → Shipping and delivery → Documents → Templates → packing slip. That export is not imported into Orderline.
Related guides
- Free Shopify packing slip templates — visual designer for Shopify’s native packing slip editor
- Custom order table columns — add the fields you want to print
- Internal production notes — staff notes that print with the customer note
- The Orderline orders view — print from the same list you work
- Fulfill, hold, unhold, and cancel — mark as fulfilled after you pack
Need more help? Contact Orderline support.